|
Continuing from the last post in How
To Combine Text Into A Path, now I'm going to learn another same thing,
but different materials
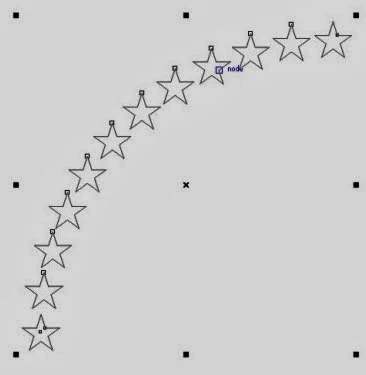
As you can see, the stars beside are placed in a pattern. CorelDRAW has the tool that can be used not just text that follow a path, but objects can follow a path or shape too.
Ok, let's begin....
|
|
|
First make New Document by pressing Ctrl+N, then draw an object, in this case I'm going to draw a star. Left click and hold the Object Flyout, then I click the star icon to start making a star. |
|
Draw a curve using the Polyline tool, located in Curve Flyout. Place the star into one of the edge of the curve.
After that copy the first star using Ctrl+C, and then Ctrl+V to paste it then and move the new star you've just pasted into the other edge of the curve, or You can copy and paste using the "+" in numpad board, it will automatically copy and paste the object.
Now You will have drawing similar to the picture beside. |
|
|
Select Star1 and go to the Interactive Tools flyout, select the Interactive Blend. Point your mouse above the Star1, left click and hold the left-click button, drag it to the Star2 |
|
When You have draged the mouse to the Star2, You will be prompted the option of the Interactive Blend. The big red rectangle is used to set the amount of objects to be offset or how many steps You want.
To move the stars along the path, simply click the Path Properties, shown by small red rectangle above, select New Path. Point your mouse to the curve You've made before. Bingo.... You've made it...
Give the path no outline, or just Break the objects and delete the path.
|
Well, its not that hard, right? See other arcticles about the
Interactive Blend feature. Happy Coreling...


No comments:
Post a Comment
Only related comments to the subject of the articles that can be proceed. If you don't have any accounts so please feel free to make a google account.
Thank you for visiting and commenting.