Hello.... we meet again.
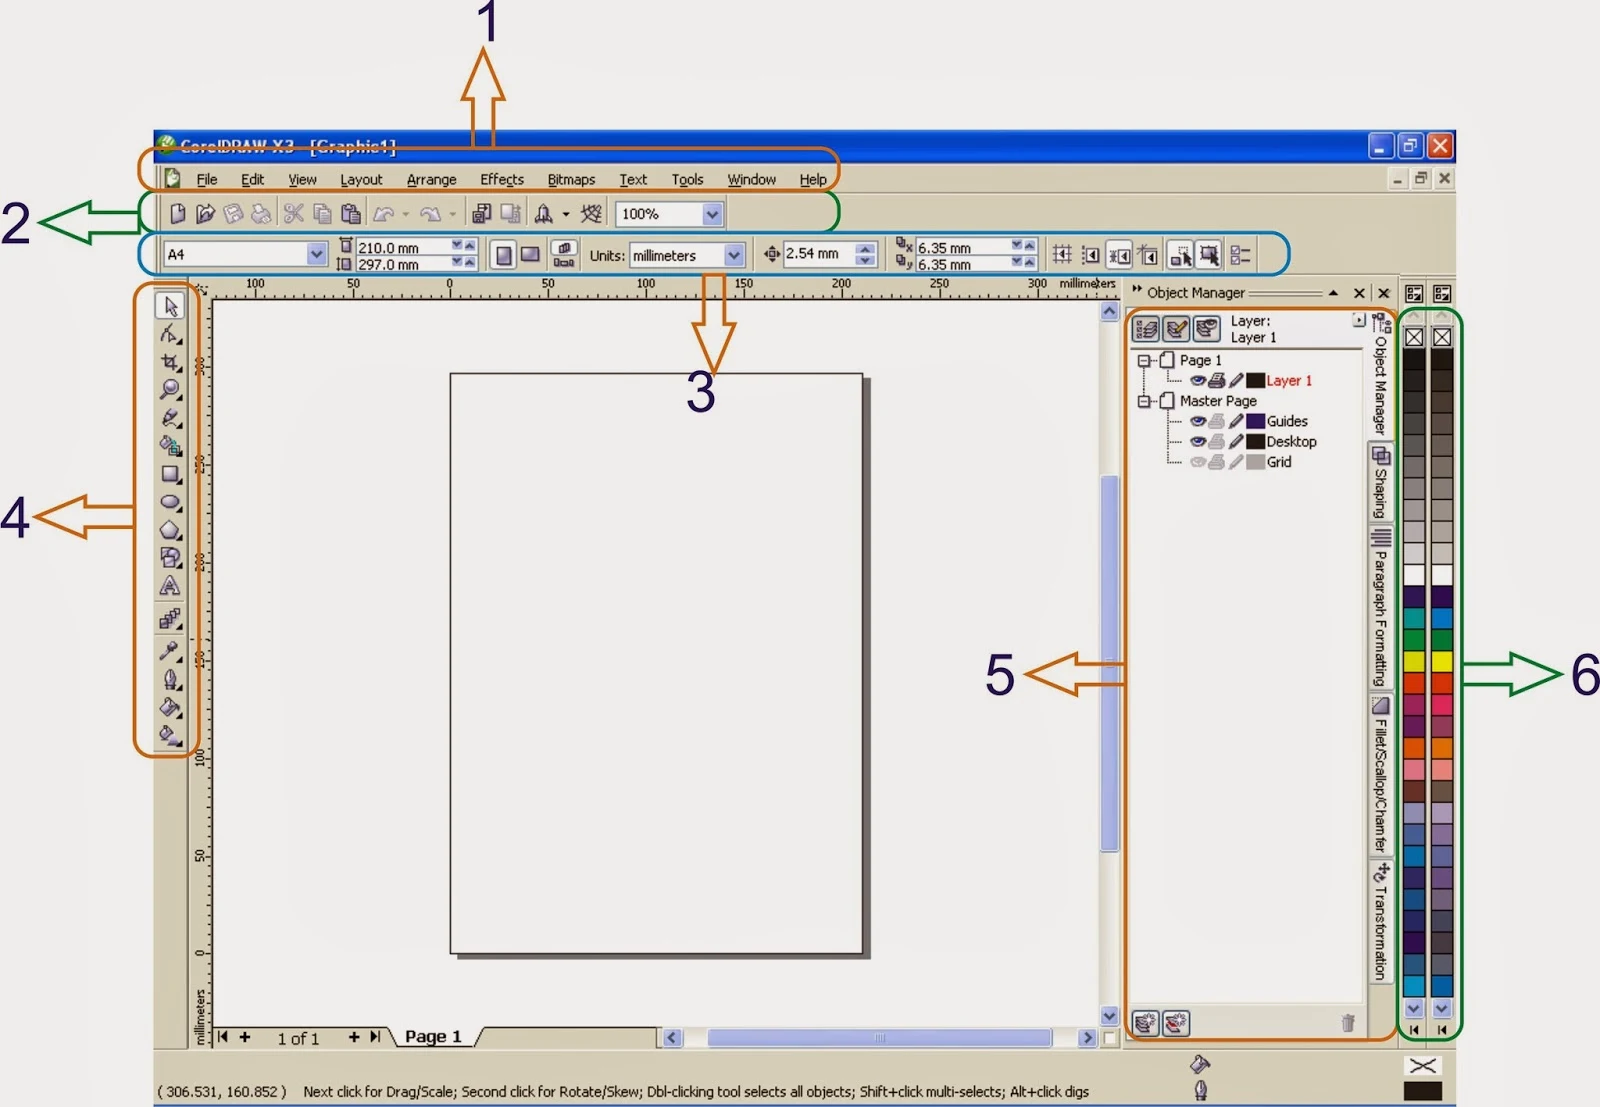
I have a lot of questions where should they start from. Actually, as a selftaught in using CorelDRAW i have no guidance where should i start from, but during the usage of CorelDRAW, i conclude that many people are confused about the first screen such as picture above. Here i try to explain basic thing, so if you maybe read another books about CorelDRAW, you know where to look from. In this explaination I used CorelDRAW X3, but there is not many so different look from the latest version CorelDRAW X6.
Ok, let's get started...
- The Menu Bar. Consist complete action. For example, to open, to save, to close the drawing using the File tab in Menu Bar and many more, just explore yourself, OK?
- The Standard Tool Bar. It consist the shortcut, such as Create new drawing, print, zoom facilities, etc
- The Property Bar. In this bar you can set paper you are using. You can know the dimension of you drawing, set the units you wish to use.
- The Toolbox. This is the main toolbar because any drawing creation starts from here. If you don't know the icon used for, just drag your mouse and place it above the shortcut you wish to know. After few second there will the pop-up text written the name of the icon and the shortcut key.
- Usually called The Dockers. This can be set from the Menu→Window→Dockers. You can select which command to be docked.
- The last is The Color Pallete. Default color is RGB color.
Well, I guess from this 6 explaination is enough for the beginning. Just explore the menu step by step or explore base only on your need, you will remember them.....
Ok, Happy Coreling.....

No comments:
Post a Comment
Only related comments to the subject of the articles that can be proceed. If you don't have any accounts so please feel free to make a google account.
Thank you for visiting and commenting.